In today’s tech landscape, ensuring high availability and resilience is non-negotiable. Yet, one crucial area often overlooked is the VPN client endpoint’s impact, especially on remote teams. Imagine the smooth sailing of your hybrid on-premises/AWS cloud environment, with the majority of services thriving on AWS. Now, picture the advantages of shifting your company’s VPN endpoint to a managed AWS solution – elevated security, resilience, scalability, and no more VPN device license fuss.
AWS Client VPN – a game-changer, seamlessly managed and anchored in client-centric VPN services. This powerhouse grants secure access to both AWS resources and on-premises networks. How? Through the dynamic duo of OpenVPN and TLS protocols, guaranteeing airtight connections to AWS.
Prerequisites :
- Cloudwatch log group and log stream
- Certificate in ACM
Embark on Your Journey: Step-by-Step Guide to Creating AWS Managed Microsoft AD
Step 1: Initiating the AWS Managed Microsoft AD
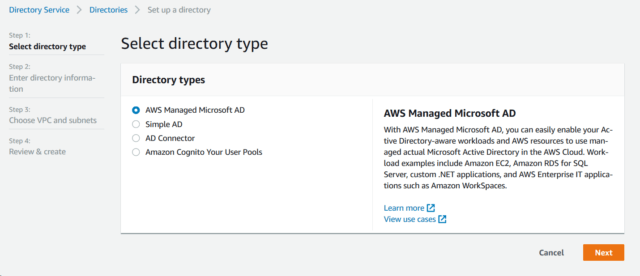
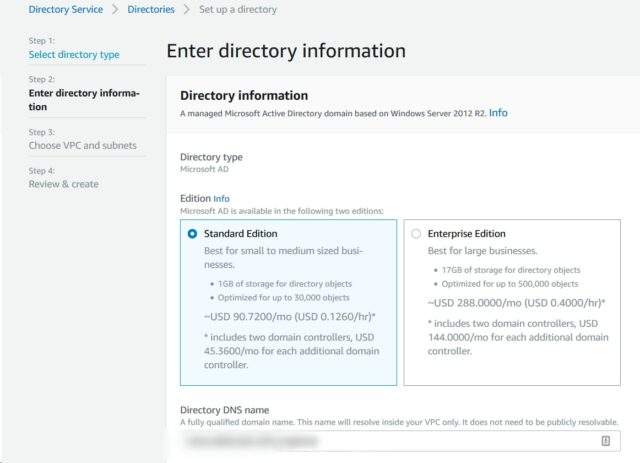
- Select the Standard edition
- Enter an internal FQDN for the domain
- create an administrator password
Step 2 : Forging Your Admin Arsenal
In the instance setup, deploy a new Windows server within a private subnet, configuring it to join the domain and create an IAM role with AmazonEC2RoleforSSM permissions for enhanced control
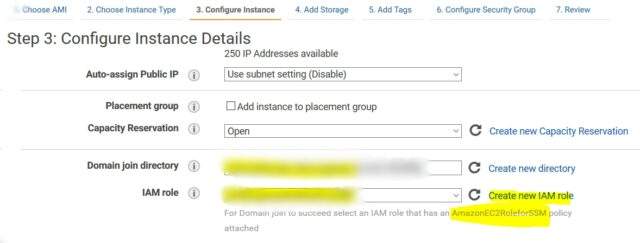
After setting up the server and accessing it via RDP using the domain administrator account (e.g., domain\admin) and the earlier password (modifiable via AWS directory if needed), follow these steps:
- Open Server Manager from the Start menu.
- In the Server Manager Dashboard, click on “Add roles and features.”
- In the Add Roles and Features Wizard, choose “Role-based or feature-based installation” under Installation Type and continue.
- Pick the local server in the Server Selection step, then navigate to the “Features” section on the left.
- Within the Features section, locate “Remote Server Administration Tools,” and within it, access “Role Administration Tools.”
- Opt for “AD DS and AD LDS Tools,” scroll down to choose “DNS Server Tools,” and proceed by selecting “Next.”
- Review the presented details and select “Install.” Once the installation concludes, you’ll discover the Active Directory tools accessible from the Start menu within the Administrative Tools folder.
After the installation, access the Active Directory Users and Computers tool from Administrative Tools. If it doesn’t open correctly, ensure you’re not logged in as a local admin; use the RDP username format domainname\admin.
Navigate to your domain’s OU (you can’t create objects above this level). Then:
- Creating Test Users: Craft a couple of test users (remember to uncheck ‘change passwords at next login’) and also set up a “Client VPN Users” security group, adding one test user to it.
- PowerShell for Group SID: Utilize PowerShell to obtain the SID of the group. Run the following command to fetch the SID, which will be used to manage VPN authorization:
(Get-ADGroup -Filter {Name -eq "Client VPN Users"}).SID
With these actions, you’re setting up a test environment, building users and groups, and fetching a crucial identifier for VPN authorization control. This paves the way for effective management of your VPN access.
Step 3: Crafting the Client VPN Endpoint
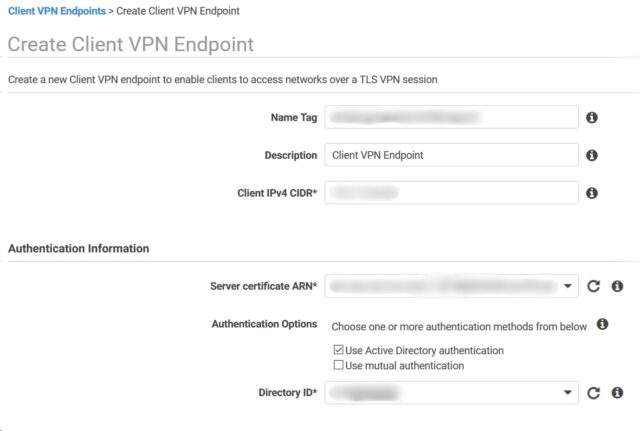

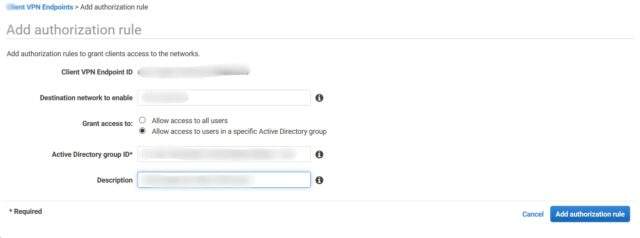
Granting Client Authorization for Network Access
It’s time to grant client authorization for network access by establishing an authorization rule that dictates which users can enter the VPC associated with the subnet
Step 4 : Download and Customize the Configuration File
Download the configuration file, open with any editor to insert the root PEM file, save, and enjoy a personalized and secure VPN connection.
Step 5 : Install the OpenVPN Client for Seamless Connection:
- Install latest stable OpenVPN client, link : https://openvpn.net/community-downloads/,
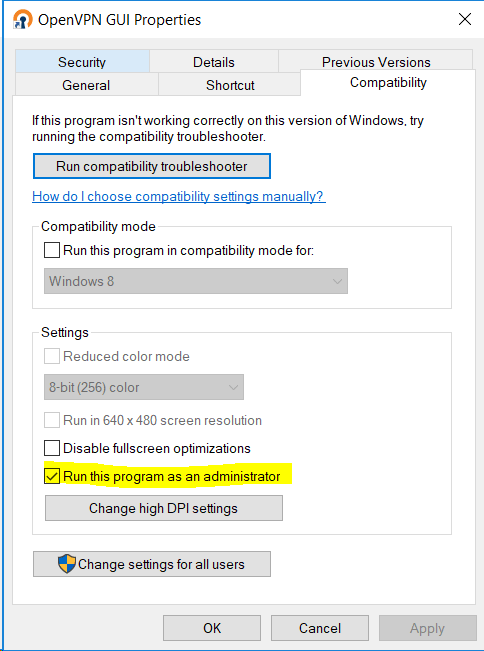
- Navigate to the Compatibility tab, and enable the “Run as administrator” option.
Step 6 : Connect to the VPN for Secure Access:
To establish your VPN connection:
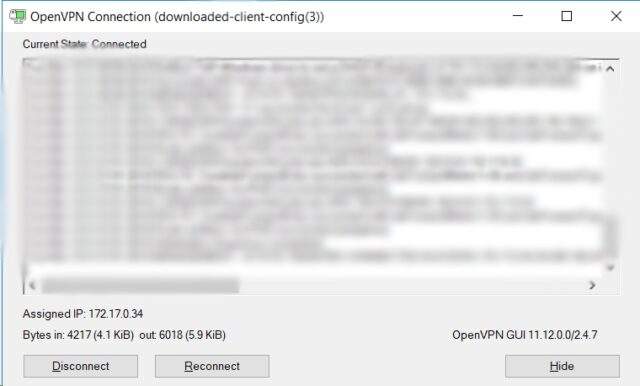
- Launch the OpenVPN software, ensuring it’s running in Administrator mode as previously configured.
- Choose your imported .ovpn profile.
- Enter the credentials of the Active Directory user you set up earlier.
As you conclude this guide to enhancing your VPN setup with AWS Client VPN and Active Directory integration, you’ve unlocked a world of secure connections and streamlined management. May your network journey be smooth, secure, and filled with tech success! Happy networking!
