Stuck with “How can I confirm multiple users in Cognito?”
“How to import users from Cognito .csv file?”
Before we begin, here are some prerequisites required:
- AWS Account and its access key and secret key.
- Basic information about Cognito
- User information.
Now let’s get started.
I will show you how to add users for a “PasswordLess” Cognito login.
But What’s PasswordLess Cognito Login?? It is nothing but signing in with a phone number and OTP
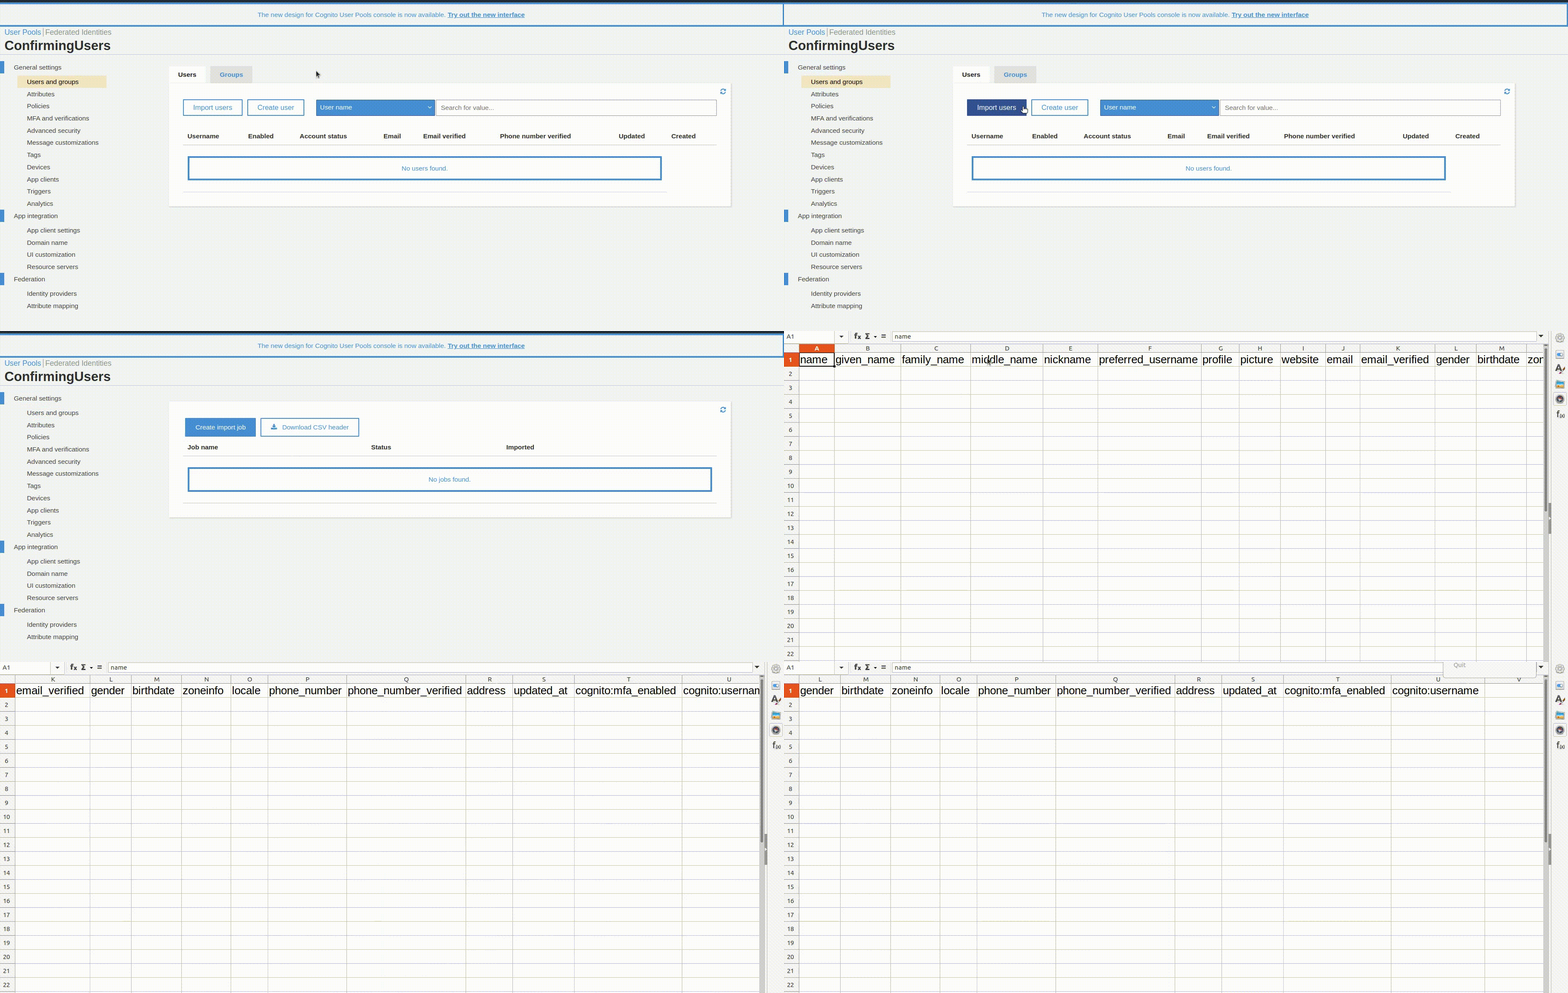
We have our user information that we need to store in AWS Cognito. AWS Cognito provides us with a basic .csv file format that is required in order to store the users. We have to enter our user’s information in that .csv file.
Let me show you how you will get the .csv file structure.

I’m opening the .csv file in my Ubuntu OS.
Here is the basic structure of the .csv file.

We need to fill in the following details in this approach.
- phone_number:- User’s phone number. It should begin with your country code. In our case, we use +91. So the final entry in the .csv file would be +919876543210.
- phone_number_verified:- Here we are entering the value as true for all the users. We are self-verifying the users.
- cognito:mfa_enabled:- If we are using MFA then the value should be true if not then false. We are not using any MFA so our value is false.
- cognito_username: The value should be the same as the phone_number.
- email_verified:- We are not going with the email and password approach. So the value will be false.
The rest of the columns would be blank. There is no need to enter all the details.
After you complete this step, save this file. The extension should be .csv file. Let’s import these Bad Boys into our Cognito.
Let’s go back to our desired Cognito in the AWS console. We will create an import job to store our users.
Follow these steps:
Go to users and groups –> Import users –> Create import job –> Enter desired job name –> IAM create a role/use existing one –> Upload .csv
Click on the job name and start the process.
This will create our users in Cognito.
Tip: If you’re getting an error. Go to Cloudwatch logs to check the logs.
Don’t worry if you are following these steps you won’t go wrong 😛
Now the import job is a success. Check out the users and groups, you will find your users stored there.
The status of all the users will be force_change_password. We will need to confirm these users. Let’s confirm these bad boys 😛
Go to your system terminal. Configure your AWS account.
You can use AWS configure command to configure your access key, secret key, and region.
You only need to run one single command to confirm all the users.
aws cognito-idp list-users --user-pool-id $COGNITO_USER_POOL_ID | jq -r '.Users | .[] | .Username' | xargs -n 1 -P 5 -I % bash -c "echo Confirming %; aws cognito-idp admin-reset-user-password --user-pool-id $COGNITO_USER_POOL_ID --username %"
Here we are listing the users from our Cognito with AWS cognitoidp command and then using JSON query to array all the users after that xargs is used to read the names from the .csv file then using reset user password we will confirm the users.
Running this command will take some time depending on how many users are in Cognito. After it is completed, all the users will be in the confirmed state.
Follow these steps and you can confirm all the users in your desired Cognito userpool.
That’s all folks.
